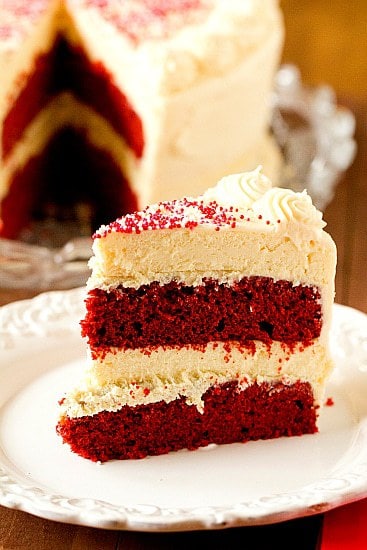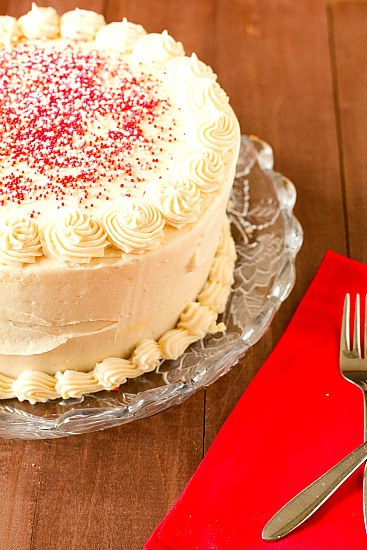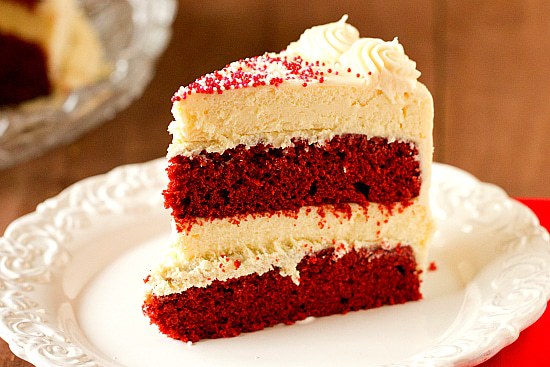
I don’t know about you, but I find any trip to The Cheesecake Factory to be completely and utterly overwhelming. Their food is delicious, but the length of their menu never ceases to both amaze and befuddle me. Even though I’ve eaten there countless times, I always spend copious amounts of time poring over each and every item while my stomach grumbles, begging me to make a quick decision. (Have I mentioned how indecisive I can be at times? It’s awful!) The real test comes after the meal, when you’re confronted with the cheesecake menu. I should make it my business to try each and every piece on that list. Not a bad hobby, right? For a long time Oreo reigned supreme for me, then I tried some different varieties which I wasn’t too fond of, and now the Snickers cheesecake is my current favorite. My Chief Culinary Consultant has an old standby favorite as well – the red velvet cheesecake. It is a four-layered dessert, with two layers each of red velvet cake and creamy cheesecake, all covered in cream cheese icing. It’s decadent, drool-worthy, and delicious. And I was totally determined to recreate that baby at home. What better time than in preparation for Valentine’s Day?

Not only am I getting ready for Valentine’s Day, but today is my Chief Culinary Consultant’s birthday! So it seems fitting that I share his favorite cheesecake selection with you on his birthday  (If you’re wondering what his all-time favorite BEB dessert is, it’s the Chocolate Peanut Butter Torte, and we spent last weekend indulging!)
Now on to the cheesecake… this really isn’t terribly difficult, just a little time consuming. It helps to spread the work out over a couple of days, and then it’s easy breezy. I started with a very basic cheesecake recipe (no crust) – baked that and got it into the fridge. Then I went ahead and doubled the recipe for my Red Velvet Cupcakes and used the batter to make two 9-inch cake rounds. To assemble, you’ll need to slice the cheesecake in half horizontally to create two layers, which you can do with a very sturdy hand and long serrated knife, or you can use a cake leveler (they’re super cheap and so easy to use – great for evening off any domed tops of cakes too). Then stack the four layers on top of one another, alternating red velvet cake and cheesecake, and then frost the whole thing with cream cheese icing. Absolutely divine!
Do you have a favorite type of cheesecake?

RED VELVET CHEESECAKE
INGREDIENTS:
For the Cheesecake:
32 ounces cream cheese, at room temperature
1¼ cups granulated sugar
4 eggs, at room temperature
¾ cup heavy cream
1 tablespoon vanilla extractFor the Red Velvet Cake:
1 cup unsalted butter, at room temperature
1½ cups granulated sugar
2 eggs
¼ cup + 1 tablespoon unsweetened cocoa powder
6 tablespoons red food coloring (liquid)
1 teaspoon vanilla extract
1 cup buttermilk
2¼ cups all-purpose flour
1 teaspoon baking soda
1 teaspoon salt
1 tablespoon distilled white vinegarFor the Cream Cheese Frosting:
1 cup butter, at room temperature
8 ounces cream cheese, at room temperature
5 cups powdered sugar
2 tablespoons vanilla extractDIRECTIONS:
1. Make the Cheesecake: Preheat oven to 350 degrees F. Butter a 9-inch springform pan and then tightly wrap the outside with heavy duty foil. (I find that double-wrapping helps prevent leaks in a water bath.) Put a pot of water (or a tea kettle) on to boil.2. Using an electric mixer, beat together the cream cheese and sugar at medium speed until completely smooth, about 3 minutes. Add the eggs one at a time, beating for a minute or so after each addition, and scraping down the sides of the bowl as needed. Add the heavy cream and vanilla extract, and beat until completely incorporated.3. Pour the batter into the springform pan; place the springform pan into a larger pan, such as a roasting pan, and pour the boiling water into the larger pan until the water comes about halfway up the side of the springform pan.4. Bake until the cheesecake edges are set but the middle still jiggles a bit, about 45 to 55 minutes. Turn the oven off, but leave the cheesecake in the oven with the door closed for 1 hour. At this point, remove the cheesecake from the water bath and place the springform pan on a cooling rack to cool to room temperature. Place the cheesecake in the refrigerator until well-chilled, at least 4 hours or overnight.5. Make the Red Velvet Cake: Preheat oven to 350 degrees F. Grease two 9-inch cake pans. Line the bottoms of the pans with a parchment round, butter the parchment paper, and then flour the pans.6. On medium-high speed, cream the butter and sugar until light and fluffy, about 3 minutes. Turn the mixer to high and add the eggs one at a time, mixing for about a minute after each addition. Scrape down the bowl and beat until well incorporated.7. In a separate small bowl, mix together the cocoa powder, vanilla extract and red food coloring to make a thick paste. Add to the batter and mix on medium speed until completely combined. You may need to stop the mixer to scrape the bottom of the bowl, making sure that all the batter gets color.8. Reduce the mixer speed to low and slowly add half of the buttermilk. Add half of the flour and mix until combined. Scrape the bowl and repeat the process with the remaining buttermilk and flour. Beat on high until smooth.9. Again, reduce the mixer speed to low and add the salt, baking soda and vinegar. Turn to high and beat for another couple of minutes until completely combined and smooth.10. Divide the batter evenly between the two cake pans and bake for about 30 minutes, or until a thin knife or skewer inserted into the center comes out clean. Cool for 10 minutes and then remove cakes from the pans and place them on a cooling rack to cool completely.11. Make the Frosting: Using an electric mixer with the whisk attachment, whip the butter and cream cheese on high speed for about 5 minutes, scraping down the bowl as necessary. Reduce the speed to low and slowly add the powdered sugar until all is incorporated. Add the vanilla and mix to combine. Increase the speed to medium-high and whip for a few minutes until the frosting is light and fluffy, scraping the bowl as necessary.12. Assemble the Cheesecake: If needed, level the tops of the red velvet cake layers with a serrated knife or cake leveler so that the tops are level and not domed. Next, slice the cheesecake in half horizontally to create two layers. Place one layer of the red velvet cake on your serving plate. Spread a very thin layer of the cream cheese frosting over it (it creates a type of glue so that the layers stick together and don't slide around). Top that with one layer of the cheesecake, and again top with a very thin layer of frosting. Repeat, adding the second red velvet layer, and then placing the second cheesecake layer on top, with a layer of frosting between them. Using the remaining frosting, cover the cake in frosting and decorate as desired. Refrigerate until ready to serve, and refrigerate any leftovers.
