Cherry Coke Float Cupcakes

Friday, 11 October 2013

Nothing says fun quite like turning one of your favorite drinks into cupcakes. So far I’ve introduced you to Irish Car Bomb Cupcakes, Limoncello Cupcakes, and Margarita Cupcakes. This time I decided to leave the alcohol behind (for a couple of days anyway, stay tuned for a fun treat later this week!) and create a cupcake tribute to one of my favorite sodas as a kid. I mentioned yesterday when talking about the Fig Bars that my parents didn’t routinely keep sweets or pop in the house while we were growing up, so we really only got them when it was a special occasion (birthday party/sleepover) or we were eating away from home. I always remember getting a Cherry Coke when we’d find ourselves at Eat n’ Park grabbing dinner. I don’t know why I associate my Cherry Coke consumption with that particular restaurant, but I don’t remember having it anywhere else. Needless to say, when I saw this rendition of a childhood favorite in cupcake form I knew they would be gracing my kitchen before long.
This recipe begins with a chocolate-cola cake, is filled with cherry pie filling, topped with a sugar-cola glaze, then finally topped off with fresh sweetened whipped cream and a cherry, of course. What’s a float without some whipped cream and a cherry?! Although there are multiple components, I was surprised at how relatively quickly these came together.
The combination of chocolate, the faint Coke flavor, the cherry filling, and then the light whipped cream on top is a sensational combination of flavors and textures. It’s a fun treat, it makes you feel like a kid again, and it’s something that I guarantee all adults will enjoy.
These would be a fun cupcake option for someone who is a fan of black forest cake. Although it’s not traditional, it’s definitely a modern twist on the chocolate/cherry combination. I also think that these cupcakes would be great for summer picnics, much like the Root Beer Float Cake that I made last year. Whether you cozy up to these now during the winter or save them, you are definitely going to want to make these cupcakes – so much fun to eat, and absolutely delicious!

CHERRY COKE FLOAT CUPCAKES

yield: 12 cupcakes
 
prep time: 45 minutes
 
cook time: 18 to 20 minutes
 
total time: 1 hour 10 minutes

INGREDIENTS:

For the Cupcakes:
1½ cups all-purpose flour
3 tablespoons cocoa powder
½ teaspoon baking soda
¼ teaspoon salt
¾ cup granulated sugar
½ cup unsalted butter, at room temperature
1 egg
½ cup buttermilk
¾ cup Coke (don't use diet)
1½ teaspoons vanilla extract
1 (21-ounce) can cherry pie filling
For the Glaze:
¾ cup powdered sugar
2 tablespoons Coke
For the Icing:
1 cup heavy whipped cream
4 tablespoons powdered sugar
Maraschino Cherries, for garnish

DIRECTIONS:

1. Make the Cupcakes: Preheat the oven to 350 degrees F and line a standard muffin pan with paper liners; set aside.
2. Sift together flour, cocoa powder, baking soda, and salt in a small bowl and set aside.
3. In a mixing bowl, combine the sugar and butter and beat on medium-high until light and creamy, about 3 minutes. Add the egg and beating for an additional minute. In a large mixing cup or small bowl, combine the buttermilk, Coke and vanilla extract. (Make sure you wait for the foam to go down when measuring the Coke and don't worry if your mixture looks curdled when you add the buttermilk.)
4. Beginning with the flour mixture, add in 4 parts to the butter mixture, alternating with the Coke mixture. Beat each addition just until incorporated. Give the final mixture a good mix with a rubber spatula to make sure it is thoroughly combined.
5. Divide the batter evenly between the muffins tins. Bake for 18-20 minutes, or until the tops spring back when touched lightly and a toothpick inserted in the center cupcake comes out clean. Cool for 5 minutes in the pan and then transfer to a wire rack to cool completely.
6. Fill the Cupcakes: Once cooled, use a paring knife to cut out a cone shape in the middle of each cupcake. Add a spoonful of cherry mixture (2 to 3 cherries) to the well.
7. Glaze the Cupcakes: In a small bowl whisk together the powdered sugar and coke. Let sit 5 to 10 minutes to thicken. It should drip off of a soon very slowly. Using a small offset spatula, drizzle a little of the glaze onto the middle of each cupcake and then gently spread it over the top.
8. Frost the Cupcakes: Beat the heavy whipping cream in a chilled bowl with whisk attachment (or hand mixer), beginning on low speed. Once the cream gets frothy begin adding the powdered sugar, 1 tablespoon at a time, increasing speed as the cream comes together until you reach medium-high speed. Whip the cream until it holds stiff peaks (if you dip a spoon in it, the whipped cream should stay on the spoon when you turn it upside down). Pipe the whipped cream onto cupcakes as desired and top with maraschino cherries for garnish.

Vanilla Cupcakes with Vanilla Buttercream Frosting

I can’t remember if I mentioned to you our little jaunt to Georgetown over the summer. I don’t think I did, did I? In any case, we descended on Georgetown with the sole purpose of taste testing cupcakes. Our first stop was naturally Georgetown Cupcake, which is featured on the TLC series “DC Cupcakes”. After struggling to find a parking spot and then standing in a 30-minute line on the hottest day of summer (I think the temp topped 110 that day), we finally got to place our order. We decided to get a 1/2 dozen of assorted cupcakes – vanilla/vanilla, chocolate/chocolate, chocolate/ganache, salted caramel, vanilla/chocolate, and chocolate/peanut butter. From there, we headed to a different area of Georgetown to check out Baked and Wired. They are a small, hip little establishment that sells not only cupcakes but also slices of pie, quiche, and some other baked goods. We got a strawberry and red velvet there. Our verdict? The red velvet and strawberry at Baked and Wired were phenomenal and better than any of the ones we got at Georgetown Cupcake, but the best one there was definitely the vanilla/vanilla. Inspired by the trip, I’m sharing these cupcakes because I think everyone needs a classic yellow cupcake recipe and fabulous vanilla frosting stashed away in their recipe binder. Don’t ya think?
This is a great combo of cupcake and frosting, and both are super duper easy. The cupcakes are buttery, melt-in-your-mouth delicious and the frosting definitely gives the cupcakes a run for their money. Not surprising that I think that since I AM a frosting girl at heart. This is my absolute favorite frosting recipe, one that I concocted a few months ago and that I used as a basis for such things as my Espresso Buttercream Frosting (which made an appearance on top of the Mocha Cupcakes), Maple-Bacon Buttercream Frosting (which topped the Pancake Cupcakes), and The Best Chocolate Buttercream for Cupcakes. Needless to say, it is my go-to frosting recipe, and I hope it will become yours too!
Stay tuned… the next cupcake posted will be red velvet!


VANILLA CUPCAKES

yield: 12 cupcakes
 
prep time: 25 minutes
 
cook time: 20 to 24 minutes
 
total time: 50 minutes

INGREDIENTS:

Vanilla Cupcakes:
1½ cups all-purpose flour
1 cup granulated sugar
1½ teaspoons baking powder
½ teaspoon table salt
8 tablespoons unsalted butter (1 stick), room temperature
½ cup sour cream
1 large egg , room temperature
2 large egg yolks , room temperature
1½ teaspoons vanilla extract
Vanilla Buttercream Frosting:
1 cup (8 ounces) unsalted butter, at room temperature
2½ cups powdered sugar
1 tablespoon vanilla extract

DIRECTIONS:

1. Adjust oven rack to middle position; heat oven to 350 degrees F. Line standard muffin/cupcake tin with paper or foil liners.
2. Whisk together flour, sugar, baking powder, and salt in bowl of standing mixer fitted with paddle attachment. Add butter, sour cream, egg and egg yolks, and vanilla; beat at medium speed until smooth and satiny, about 30 seconds. Scrape down sides of bowl with rubber spatula and mix by hand until smooth and no flour pockets remain.
3. Divide batter evenly among cups of prepared tin. Bake until cupcake tops are pale gold and toothpick or skewer inserted into center comes out clean, 20 to 24 minutes. Remove the cupcakes from tin and transfer to wire rack; cool cupcakes to room temperature before frosting.
4. Using the wire whisk attachment of your stand mixer, whip the butter on medium-high speed for 5 minutes, stopping to scrape the bowl once or twice.
5. Reduce the speed to low and gradually add the powdered sugar. Once all of the powdered sugar is incorporated, increase the speed to medium-high and add the vanilla, mixing until incorporated. Whip at medium-high speed until light and fluffy, about 2 minutes, scraping the bowl as needed.
You can store any unused buttercream in the refrigerator in an airtight container; let it come to room temperature and then give it a quick whip in the mixer before using.

Tiramisu Cupcakes


Today I ring in the big 3-1. No longer am I merely 30, but I am in my 30′s. So weird, especially since I still don’t really feel too much like a grown up ;-) And as I like to do every year, I baked something new and different to celebrate with. It sort of reminds me of being a kid when you’d bring treats to school to share with the class on your birthday (did anyone else do this?). This is me bringing treats in for the class and sharing with all of you :)   Since today I am en route to a Florida vacation with my Chief Culinary Consultant (woo!), I baked up my birthday treat earlier this week. Almost without fail, I always make some sort of cheesecake for my birthday (the Oreo Cheesecake and Peanut Butter-Fudge Cheesecake being my favorites), but this year I decided to try something different, and wow! So glad I did!
Next to cheesecake, tiramisu is one of my all-time favorite desserts. When I was younger, if I wasn’t going to the Olive Garden for the Andes mints, I was going for the tiramisu. I first made a homemade tiramisu a few years ago, and I was totally hooked. I don’t make it very often (it’s such a decadent/special occasion type of dessert), but when I saw these cupcakes I thought they were the perfect way to get the tiramisu flavor I love without making an entire pan. Plus, everyone loves cupcakes nowadays, right?? And now I am on an official boozy cupcake kick!
These cupcakes are absolutely, insanely delicious and really taste just like tiramisu! I was wondering how much the authentic flavor would come through, but it totally does. The vanilla bean cakes are brushed over and over, and over, with an espresso and marsala wine mixture so that it soaks through the cupcake. Then they’re topped with a mascarpone cheese frosting and dusted with cocoa powder. Happy birthday to me, for sure!

TIRAMISU CUPCAKES
yield: 18 cupcakes
 
prep time: 1 hour
 
cook time: 20 minutes
 
total time: 1 hour 20 minutes

INGREDIENTS:

For the Cupcakes:
1¼ cups cake flour (not self-rising), sifted
¾ teaspoon baking powder
½ teaspoon coarse salt
¼ cup milk
1 vanilla bean, halved lengthwise, seeds scraped and reserved
4 tablespoons unsalted butter, at room temperature, cut into pieces
3 whole eggs plus 3 egg yolks, at room temperature
1 cup granulated sugar
For the Coffee-Marsala Syrup:
1/3 cup plus 1 tablespoon freshly brewed very strong coffee (or espresso)
1 ounce marsala wine
¼ cup granulated sugar
For the Mascarpone Frosting:
1 cup heavy cream
8 ounces mascarpone cheese, room temperature
½ cup confectioners' sugar, sifted
Unsweetened cocoa powder, for dusting

DIRECTIONS:

1. Preheat oven to 325 degrees F. Line standard muffin tins with paper liners. Sift together cake flour, baking powder, and salt. Heat milk and vanilla-bean pod and seeds in a small saucepan over medium heat just until bubbles appear around the edge. Remove from heat. Whisk in butter until melted, and let stand 15 minutes. Strain milk mixture through a fine sieve into a bowl, and discard vanilla-bean pod.
2. With an electric mixer on medium speed, whisk together whole eggs, yolks, and sugar. Set mixing bowl over a pan of simmering water, and whisk by hand until sugar is dissolved and mixture is warm, about 6 minutes. Remove bowl from heat. With an electric mixer on high speed, whisk until mixture is fluffy, pale yellow, and thick enough to hold a ribbon on the surface for several seconds when whisk is lifted.
3. Gently but thoroughly fold flour mixture into the egg mixture in three batches; stir ½ cup batter into the strained milk mixture to thicken, then fold milk mixture into the remaining batter until just combined.
4. Divide batter evenly among lined cups, filling each three-quarters full. Bake, rotating tins halfway through, until centers are completely set and edges are light golden brown, about 20 minutes. Transfer tins to wire racks to cool completely before removing cupcakes.
5. Make the syrup: Stir together coffee, marsala, and sugar until sugar is dissolved. Let cool.
6. Brush tops of cupcakes evenly with coffee-marsala syrup; repeat until all syrup has been used. Allow cupcakes to absorb liquid 30 minutes.
7. Make frosting: With an electric mixer on medium speed, whisk heavy cream until stiff peaks form (be careful not to overbeat, or cream will be grainy). In another bowl, whisk together mascarpone and confectioners' sugar until smooth. Gently fold whipped cream into mascarpone mixture until completely incorporated. Use immediately.
8. To finish, Dollop frosting onto cupcakes; refrigerate up to overnight in airtight containers. Dust generously with cocoa powder just before serving.

Red Velvet Cupcakes with Cream Cheese Frosting

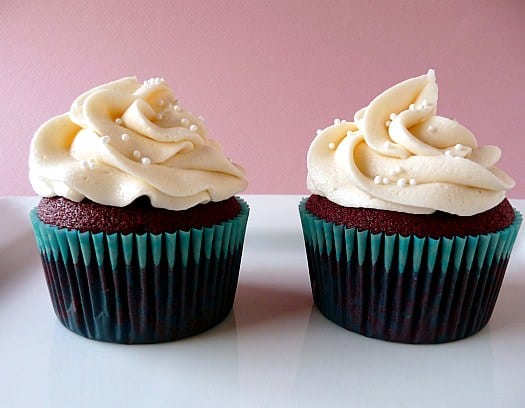
Really good red velvet cupcakes are elusive to many. Some are dry, some are TOO fake-red red. And what’s the story behind red velvet cake (and cupcakes) anyway? After doing a little research, I found that while foods were rationed during war time, bakers used boiled beets to enhance the color of their cakes and to retain moisture. Red velvet cake was a signature dessert at the Waldorf-Astoria Hotel during the 1920s, and was also well-known in the restaurants and bakeries of the Eaton’s department store chain in Canada during the 1940s and 1950s. Many attribute the cake’s recent popularity to the film Steel Magnolias, in which the groom’s cake was a red velvet cake in the shape of an armadillo. All red velvet cakes have specific ingredients in common: white vinegar, buttermilk and baking soda; the reaction of the vinegar to the buttermilk is said to better reveal the red in the cocoa powder. I wasn’t always sold on red velvet, but I was eventually converted…
So now, on to my history with red velvet. I first tried it almost a year ago (January, to be specific) at a local Pittsburgh bakery. And to say that I was underwhelmed would be a gross understatement. After all of the buzz that red velvet had been receiving, I was expecting to be blown away. What I ate was pretty dry and tasteless (although the cream cheese frosting was good!). I wasn’t impressed (obviously) and it was about six months before I would try one again. During our little Georgetown cupcake tour, I had a red velvet cupcake from Baked and Wired. It was seriously amazing. It changed my mind about red velvet – it was fluffy, moist, with a hint of chocolate, and was all kinds of delicious. I had been converted.
The next step, of course, was to make a great one at home. I was admittedly stalling a bit but thanks to some of you who emailed me asking why in the world there wasn’t a recipe for red velvet cupcakes on my site (which is an absolutely legit question), I got my butt in gear. I did some reading, I looked at a lot of recipes, and in the end I decided to try this one. And I’m so glad I did, because I don’t think a better one could exist. They are everything I was hoping for – moist, fluffy, a tiny bit chocolatey, and a perfect vehicle for a heaping pile of cream cheese frosting!
Good any time of year, especially around Valentine’s Day. Dress ‘em up with some pink and red sprinkles and share them with your sweetie!

RED VELVET CUPCAKES WITH CREAM CHEESE FROSTING

yield: 12 cupcakes
 
prep time: 15 minutes
 
cook time: 20 minutes
 
total time: 35 minutes

INGREDIENTS:

For the Cupcakes:
4 tablespoons unsalted butter, at room temperature
¾ cup granulated sugar
1 egg
2½ tablespoons unsweetened cocoa powder
3 tablespoons red food coloring
½ teaspoon vanilla extract
½ cup buttermilk
1 cup + 2 tablespoons all-purpose flour
½ teaspoon salt
½ teaspoon baking soda
1½ teaspoons distilled white vinegar
For the Cream Cheese Frosting:
4 ounces butter, at room temperature
4 ounces cream cheese, at room temperature
2½ cups powdered sugar
1 tablespoon vanilla extract

DIRECTIONS:

1. Preheat oven to 350 degrees F. Line a standard muffin/cupcake pan with liners.
2. On medium-high speed, cream the butter and sugar until light and fluffy, about 3 minutes. Turn the mixer to high and add the egg. Scrape down the bowl and beat until well incorporated.
3. In a separate small bowl, mix together the cocoa powder, vanilla extract and red food coloring to make a thick paste. Add to the batter and mix on medium speed until completely combined. You may need to stop the mixer to scrape the bottom of the bowl, making sure that all the batter gets color.
4. Reduce the mixer speed to low and slowly add half of the buttermilk. Add half of the flour and mix until combined. Scrape the bowl and repeat the process with the remaining milk and flour. Beat on high until smooth.
5. Again, reduce the mixer speed to low and add the salt, baking soda and vinegar. Turn to high and beat for another couple of minutes until completely combined and smooth.
6. Divide the batter evenly between the cupcake liners and bake for about 20 minutes, or until a thin knife or skewer inserted into the center of the largest cupcake comes out clean.
7. Cool for 10 minutes and then remove cupcakes from the pan and place them on a cooling rack to cool completely before frosting.
8. To make the frosting: Using the whisk attachment, whip the butter and cream cheese on high speed for about 5 minutes, scraping the bowl down as necessary. Reduce the speed to low and slowly add the powdered sugar until all is incorporated. Add the vanilla and mix to combine. Increase the speed to medium high and whip for a few minutes until the frosting is light and fluffy, scraping the bowl as necessary.
*Note: This recipe can be doubled to make an 8 or 9-inch layer cake.

Pumpkin Cupcakes with Cream Cheese Frosting

pumpkin-cupcakes-plain
If you’re looking for a fall dessert that includes all of the best flavors of the season – pumpkin, cinnamon, nutmeg, and ginger – and that just so happens to have a healthy dollop of cream cheese frosting on top, then these cupcakes are definitely for you. Warm, spiced, sweet and utterly addicting. In the oven for only 5 minutes and I could have sworn that time had been thrust forward a few weeks and it was Thanksgiving day. The aroma from the cupcakes was heavenly. I almost said, “I wish I could bottle that smell!” but then realized that I could, in fact, go out and buy a pumpkin pie-scented candle ;-)
I owe another nod to my Chief Culinary Consultant for this one, as I was trying to think about what to make to bring to a little Halloween gathering that we were going to and he suggested pumpkin cupcakes with cream cheese frosting. Brilliant, of course! The cupcakes were every bit as scrumptious as I suspected they would be.
pumpkin-cupcakes-group
The original recipe for these cupcakes includes topping them with little marzipan pumpkins. I was thinking about making some little fondant pumpkins to put on top, but didn’t quite have enough time to do so. I think they would be a perfectly festive addition to the cupcakes! Instead I left some cupcakes plain with just the icing, topped some with candy corn and some others with chopped walnuts. I am thinking that the next time I make these (and there will be many, MANY next times) I will add some maple syrup to the cream cheese icing to bump up the autumn flavors even more.
Do you have a favorite pumpkin recipe?
pumpkin-cupcakes-closeup


PUMPKIN CUPCAKES WITH CREAM CHEESE FROSTING

yield: 32 cupcakes
 
prep time: 30 minutes
 
cook time: 18 minutes
 
total time: 45 minutes

INGREDIENTS:

For the Cupcakes:
4 cups cake flour (not self-rising), sifted
1 teaspoon baking soda
1 Tablespoon + 1 teaspoon baking powder
1 teaspoon salt
2 teaspoons ground cinnamon
1 Tablespoon ground ginger
1 teaspoon freshly grated nutmeg
¼ teaspoon ground cloves
1 cup (2 sticks) unsalted butter, room temperature
2½ cups packed light-brown sugar
4 large eggs
1 cup buttermilk
1½ cups canned pumpkin (not pie filling)
For the Cream Cheese Frosting:
1 cup (2 sticks) unsalted butter, room temperature
12 ounces cream cheese, room temperature
1 pound (4 cups) confectioners' sugar, sifted
¾ teaspoon vanilla extract

DIRECTIONS:

To Make the Cupcakes:
1. Preheat oven to 350°F. Line standard muffin tins with paper liners. Sift together flour, baking soda, baking powder, salt and spices.
2. With an electric mixer on medium-high speed, cream butter and brown sugar until pale and fluffy. Add eggs, one at a time, beating until each is incorporated, scraping down sides of bowl as needed. Reduce speed to low. Add flour mixture in three batches, alternating with two additions of buttermilk, and beating until just combined. Add pumpkin; beat until just combined.
3. Divide batter evenly among lined cups, filling each three-quarters full. Bake, rotating tins halfway through, until golden brown, 15 to 18 minutes. Transfer tins to wire racks to cool 10 minutes; turn out cupcakes onto racks and let cool completely. Cupcakes can be refrigerated up to 3 days in airtight containers.
4. To finish, use an offset spatula or a pastry bag fitted with a decorated tip to top the cupcakes with cream cheese frosting.
To Make the Frosting:
With an electric mixer on medium-high speed, beat butter and cream cheese until fluffy, 2 to 3 minutes. Reduce speed to low. Add sugar, ½ cup at a time, and then vanilla, and mix until smooth and combined, scraping down sides of bowl as needed.
If not using immediately, frosting can be refrigerated up to 3 days in an airtight container; before using, bring to room temperature, and beat on low speed until smooth again.

Mocha Cupcakes with Espresso Buttercream Frosting

Mocha Cupcakes with Espresso Buttercream Frosting
You’ll be happy to know that I have recovered from my epic kitchen fail, the oven is sparkling, and to celebrate I give you these amazing mocha cupcakes with espresso buttercream frosting. Plus, it’s Friday. And cupcakes are a perfect way to welcome the weekend with open arms. It’s been a crazy, messy, stormy week, and you deserve one. I might even go so far as to suggest that you should just skip your morning cup of coffee or trip to Starbucks and have one of these instead. The cupcakes themselves strike a subtle balance between light chocolate and a hint of creamy coffee. Not overwhelming on either end of the spectrum, and the combination results in a smooth, clean flavor, which is perfect for topping with espresso-spiked buttercream. I’ve been trying a new method for making buttercream for cupcakes, and I think you’re going to love it as much as I do. It involves lots of whipping of the butter, and then really whipping the finished buttercream. It gives the frosting a very smooth texture and it melts in your mouth. And as always, I try to achieve at least a 1:1 ratio of frosting to cake when frosting my cupcakes. Frosting is dreamy, yes? I could eat it with a spoon, straight from the mixing bowl.
Mocha Cupcakes with Espresso Buttercream Frosting
Now, back to my baking disaster (sort of) for a moment. I wanted to share a recipe resource with all of you in the event that you don’t know about it yet. There is a custom Google search engine called Food Blog Search, built and maintained by Elise from Simply Recipes and Kayln ofKayln’s Kitchen, which pulls search results from over 2,000 hand-selected food blogs. It’s typically my first stop when I’m searching for inspiration for a specific recipe. While I absolutely adore my cookbook collection and find many wonderful recipes among their pages, I know that any recipe I find on a fellow blogger’s site will have been tested and reviewed, with honest feedback. That is invaluable information when undertaking something in the kitchen! Stopping there first instead of my cookbook shelf may have saved me from an oven of overflowing batter. In fact, I think you should bake these cupcakes, then mosy on over to your computer and eat the cupcake while testing out the Food Blog Search.


Mocha Cupcakes
Yield: 12 cupcakes
Prep Time: 15 minutes Baking Time: 17-20 minutes
1-1/3 all-purpose flour
1/3 cup unsweetened cocoa powder
1 teaspoon baking powder
½ teaspoon baking soda
¼ teaspoon salt
½ cup whole milk
½ cup strong brewed coffee
1½ teaspoons espresso powder
1 teaspoon vanilla extract
½ cup (1 stick) unsalted butter, at room temperature
½ cup granulated sugar
½ cup light brown sugar
1 egg, at room temperature
1. Mix the espresso powder into the brewed coffee until dissolved; set aside to cool to room temperature.
2. Preheat the oven to 350 degrees F. Line a standard-size muffin tin with paper liners.
3. Whisk together the flour, cocoa powder, baking powder, baking soda and salt.
4. Beat the butter and both sugars together on medium-high speed until light and fluffy, about 2-3 minutes. Add the egg and beat until combined. In a measuring cup, combine the milk, brewed coffee mixture and vanilla. Slowly add the flour mixture, alternating with the coffee mixture, ending with the flour mixture.
5. Divide the batter evenly between the 12 liners. Baking for 17-20 minutes or until a toothpick inserted in the center of a cupcake comes out clean. Cool completely before frosting cupcakes.

Espresso Buttercream Frosting
Makes enough to frost 12 cupcakes
1 cup (2 sticks) unsalted butter, at room temperature
2½ cups powdered sugar
1½ teaspoons vanilla extract
1½ teaspoons espresso powder
1. Mix the espresso powder into the vanilla until dissolved; set aside.
2. Using the whisk attachment of a stand mixer, whip the butter on medium-high speed for 5 minutes, stopping once to scrape the sides of the bowl. Reduce the mixer speed to low and add the powdered sugar a little at a time, waiting until it is mostly incorporated before adding more. Once all of the powdered sugar has been added, scrape the sides of the bowl and increase the speed to medium-high and whip until fluffy, about a minute or two. Add the espresso and vanilla mixture and continue to mix at medium-high until it is completely incorporated, scraping the sides as necessary.
*Note: To make the swirls on the cupcakes, I used a 1M decorating tip.

Margarita Cupcakes


Happy Cinco de Mayo!
The one day a year when we can stuff ourselves full of chips, salsa, guacamole and margaritas. It’s a little bit of a foodie nirvana. Of course there is historical significance to the day, which I shared in my homemade restaurant style salsa post. But like most holidays that celebrate a heritage, people enjoy celebrating Cinco de Mayo with authentic food and drink. I for one love Mexican food and am looking forward to chowing down on chips and salsa for at least one meal and then washing it down with one (or two) of these cupcakes. Since margaritas are a classic Mexican cocktail, I found it only fitting to make margarita cupcakes for dessert on Cinco de Mayo!
Tequila and lime? Check!
They say you should only cook with wine that is good enough to drink, and I hold the same belief when it comes to liquor and baking, so I decided that these cupcakes called for Patrón Silver tequila. And since you can definitely taste the tequila in the cupcake as well as the frosting, I think this was a good call. Yum.
I did some web surfing to see what I could find in the way of margarita cupcakes, and unfortunately came across a ton of recipes that used a box cake mix. Not exactly what I was going for. And then I turned to the ever-faithful Food Blog Search and found a recipe fromShawnda for margarita cupcakes from scratch. Bingo!
Except for two things: there wasn’t any tequila actually in the cupcakes, and the frosting was a Swiss meringue buttercream (I don’t like fussy, complicated frostings – butter, sugar and added flavors do me just fine).
I adapted the cupcake recipe to amp up the liquor quotient by adding tequila into the cupcakes as well as brushing tequila onto the cupcakes after they were done baking. Mucho tequila = muy bueno. (I took 7 years of Spanish, I should put it to a little use!) Then I adapted my absolute favorite basic vanilla frosting to include lime juice and tequila, and voilà! Verrrrrrry boozy cupcakes!
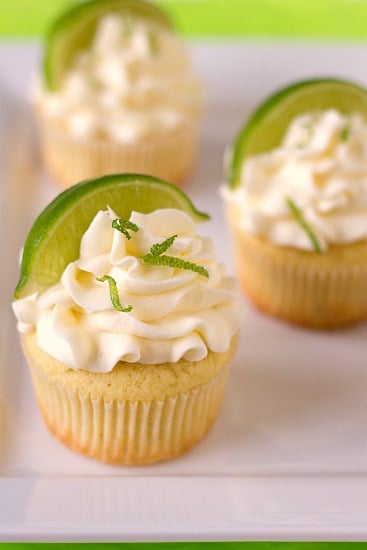
Yet they look so innocent, don’t they? Sitting there all pretty with green garland laying like a feather on the buttery pillows of frosting.
They are definitely not innocent. They are all things tequila and lime. The cupcakes are buttery and moist. The frosting is velvety and buttery (more butter!). And there is a prevalent lime/tequila taste throughout. They are a Cinco de Mayo dream. If you like margaritas (or just boozy cupcakes), you will fall in love with these babies. And they’re perfect for toting along to picnics and cook-outs all summer long!
What are your eating and drinking plans for Cinco de Mayo??


MARGARITA CUPCAKES

yield: 12 cupcakes
 
prep time: 25 minutes
 
cook time: 25 minutes
 
total time: 50 minutes

INGREDIENTS:

For the Cupcakes:
1½ cups all-purpose flour
1½ teaspoons baking powder
¼ teaspoon salt
½ cup unsalted butter, at room temperature
1 cup granulated sugar
2 eggs, at room temperature
Zest and juice of 1½ limes
2 tablespoons tequila
¼ teaspoon vanilla extract
½ cup buttermilk
To Brush the Cupcakes:
1 to 2 tablespoons tequila
For the Tequila-Lime Frosting:
1 cup unsalted butter, at room temperature
2¾ cups powdered sugar
1 tablespoon lime juice
2 tablespoons tequila
Pinch of coarse salt

DIRECTIONS:

1. Preheat the oven to 325 degrees F. Line a standard muffin tin with paper liners; set aside.
2. In a medium bowl, whisk together the flour, baking powder and salt; set aside.
3. In an electric mixer on medium-high speed, beat the butter and sugar together until pale, light, and fluffy (about 5 minutes).
4. Reduce the mixer speed to medium and add the eggs one at at time, mixing thoroughly after each addition.
5. Scrape the sides of the bowl and add the lime zest, lime juice, vanilla extract and tequila. Mix until combined. (The mixture may start to look curdled at this point, but don't worry, it will all come back together, power on!)
6. Reduce the mixer speed low. Add the dry ingredients in three batches, alternating with the buttermilk in two batches. Mix only until just incorporated, using a rubber spatula to give it one last mix by hand.
7. Divide the batter between the muffin cups. Bake for approximately 25 minutes or until just slightly golden and a skewer shows only moist crumbs attached, rotating the pan at the halfway point.
8. Allow cupcakes to cool for 5 to 10 minutes, and then remove to a cooling rack. Brush the tops of the cupcakes with the 1 to 2 tablespoons of tequila. Set the cupcakes aside to cool completely before frosting them.
9. To make the frosting, whip the butter on medium-high speed of an electric mixer using the whisk attachment for 5 minutes. Reduce the speed to medium-low, and gradually add the powdered sugar, mixing and scraping the sides of the bowl until all is incorporated. Give it a mix on medium speed for about 30 seconds. Add the lime juice, tequila and salt mix on medium-high speed until incorporated and fluffy. If the frosting appears a bit too soft, add some additional sugar, one spoonful at a time until desired consistency is reached. Frost cupcakes and garnish, if desired, with lime zest, an additional sprinkling of salt and a lime wedge.
*Note #1: If you would prefer to not use liquor in these cupcakes, you can absolutely omit it from both the cupcakes and the frosting with no problem. If you do omit it, I would add 1 tablespoon of vanilla extract to the frosting.
*Note #2: I used a Wilton 1M tip to frost the cupcakes.

Lemon-Limoncello Cupcakes

lemon-limoncello-cupcakes-platter
These cupcakes have almost rendered me speechless. Trying to come up with the words to describe the incredible flavor experience that these provide is no small task. These lemon beauties topped off an Italian-themed meal (one that had begun with the Fontina-Stuffed Bacon-Wrapped Dates as an appetizer) and was the perfect clean-flavored dessert that I was looking for. There are three levels of lemon flavor in the cupcakes that combine to deliver the perfect balance of tart and sweet, and had people fighting over the last cupcake (seriously). The batter is flavored with lemon zest, lemon juice and a punch of limoncello; a tart lemon curd fills the inside of the cupcakes, and on top sits a sweet cream cheese frosting with the subtle tang of limoncello. These are simple and classy, a perfect dessert for a summer meal.
lemon-limoncello-cupcakes-filling
Although comprised of three separate steps, these cupcakes are simple to put together and not very time consuming. While the cupcakes are in the oven baking, the lemon curd can be made in less than 10 minutes. While the cupcakes and curd cool, make the frosting and then you are ready to assemble and serve! I tasted a spoonful of lemon curd before assembling the cupcakes and thought it might be a bit too tart, but was pleasantly surprised when I tasted the entire cupcake. The curd didn’t appear too tart at all, and was perfectly balanced by the cake and frosting. As you can see, I popped the finished cupcakes into an additional liner – Wilton Nut & Party Cups – for a prettier presentation.
If you want to make homemade limoncello, you can certainly do so, but plan ahead! Homemade recipes require 7 to 10 days of the lemon steeping in vodka before proceeding with the rest of the recipe. If you want to give it a go, you can find recipes here and here.
lemon-limoncello-cupcake-single


LEMON-LIMONCELLO CUPCAKES

yield: 1 dozen
 
prep time: 45 minutes
 
cook time: 25 minutes
 
total time: 1 hour 10 minutes

INGREDIENTS:

For the cupcakes:
1½ cups all-purpose flour
1 teaspoon baking powder
½ teaspoon salt
2 ounces (½ stick) unsalted butter, at room temperature
2 ounces cream cheese, at room temperature
1 cup granulated sugar
3 large eggs
2 tablespoons limoncello
½ cup buttermilk
¼ cup lemon juice
Zest of one lemon
For the lemon curd:
Zest of 2 lemons
½ cup lemon juice
¼ cup granulated sugar
1 egg + 1 egg yolk
For the cream cheese limoncello frosting:
2 ounces (½ stick) unsalted butter, at room temperature
4 ounces cream cheese, at room temperature
1 tablespoon limoncello
2 cups powdered sugar, sifted

DIRECTIONS:

1. Prepare the cupcakes. Preheat the oven to 350 degrees F and position a rack in the center. In a medium bowl, combine the flour, baking powder and salt; set aside. In the bowl of an electric mixer fitted with a paddle attachment, beat the butter, cream cheese and sugar on medium speed until light and creamy, 2-3 minutes. Add the eggs, one at a time, beating well after each addition. Add the limoncello and beat an additional minute. On low speed, add flour mixture and buttermilk alternatively, beginning and ending with the flour mixture. Add the lemon juice and zest and mix on low speed just until incorporated. Divide the batter between 12 muffin tins. Bake for 20 minutes or until a toothpick inserted near the middle comes out clean. Let cool completely.
2. Prepare the lemon curd. In a heavy medium saucepan, stir together the lemon zest, juice and sugar and bring to a simmer over medium heat. In a small bowl, whisk together the egg and egg yolk. Whisk the lemon mixture into the eggs to temper them. Scrape the mixture back into the saucepan and place over medium heat, whisking constantly until it thickens, about 5 minutes. Remove from the heat, and let cool completely.
3. Prepare the cream cheese limoncello frosting. In the bowl of an electric mixer fitted with the paddle attachment, beat the butter and cream cheese on medium speed until light and creamy, about 2-3 minutes. Add the limoncello and beat for an additional minute. Reduce the speed to low and gradually add the sifted powdered sugar and beat until fully incorporated and smooth.
4. Assemble the cupcakes. Cut a hole into each cupcake with the large end of a melon baller or the back end of a large pastry tip. Fill each cavity with the lemon curd. Fill a pastry bag with a star tip (I used Wilton 1M) with the cream cheese limoncello frosting and pipe onto each cupcake. Decorate with lemon and berries, if desired.
Copyright @ 2013 makingfooditems. Designed by Templateism | MyBloggerLab

About Metro