General Tso’s Chicken

Friday, 11 October 2013

It wasn’t until the last few years that I really have started to embrace Asian cuisine. I’ve had a lot of firsts, including sushi, and the different flavors and dishes have definitely grown on me. Most college kids rely on Chinese take out to get them through cram sessions and heartache, but I was always more of a pizza girl. I leaned on Domino’s. I, of course, had tried Chinese before, but was never crazy about it. All of that changed when I started spending time at my Chief Culinary Consultant’s. When he first mentioned ordering Chinese and I said that I hadn’t ever found something I really liked, he said I had to get General Tso’s, and that I would love it. He knows me all too well, because I absolutely adored it. Between the crunchy, battered chicken, the thick sauce, and the generous amount of spice, I was completely smitten. It soon became my favorite take out option, and I found myself craving it. We had talked about trying to make it at home, but until now I hadn’t found a recipe that I thought sounded authentic enough. I’m thrilled to have found this one; I think we might be cooking in Chinese more often than we order it out now!
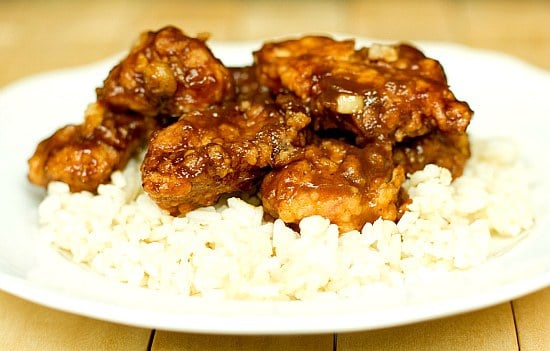
I was most worried about the chicken breading having that characteristic thick, crunchy coating that is so typical of General Tso’s. That was definitely achieved, thanks to including just a little bit of the marinade in the dry batter ingredients. Genius! Everything else came together perfectly. As I cooked the sauce, I couldn’t believe how absolutely identical it smelled to the General Tso’s sauce I have come to know and love. Once everything was finished and we dug in, we hardly spoke a word, except to grunt and groan about how phenomenal the food was. And how much it really did taste like General Tso’s. Easily one of the best dinners I’ve made in the last year or so. Top 3, for sure. It’s going into the permanent rotation and very likely will replace many a take out meal for us.


GENERAL TSO'S CHICKEN

yield: 4 servings
 
prep time: 1 hour 15 minutes
 
cook time: 10 minutes
 
total time: 1 hour 30 minutes

INGREDIENTS:

For the Marinade & Sauce:
½ cup hoisin sauce
¼ cup white vinegar
3 tablespoons soy sauce
3 tablespoons sugar
2 tablespoons cornstarch
1½ cups water
4 boneless, skinless chicken breasts (about 1½ pounds), cut into 1-inch pieces
1 tablespoon vegetable oil
4 garlic cloves, minced
2 tablespoons grated fresh ginger
½ teaspoon crushed red pepper flakes
For Coating & Frying:
3 egg whites
1½ cups cornstarch
½ cup all-purpose flour
½ teaspoon baking soda
4 cups vegetable oil
1-2 green onions, thinly sliced (optional, garnish)

DIRECTIONS:

1. To make the marinade, whisk the hoisin sauce, vinegar, soy sauce, sugar, cornstarch, and water in a bowl. Of this mixture, place 6 tablespoons into a zip lock storage bag and add the chicken; seal and refrigerate for at least 30 minutes. Set aside the remaining marinade in the bowl.
2. While the chicken is chilling in the marinade, heat the 1 tablespoon of vegetable oil in a large skillet over medium heat until shimmering. Sauté the garlic, ginger and red pepper flakes until fragrant. Add 2 cups of the hoisin marinade to the skillet and simmer, whisking constantly, until the mixture is dark brown and thickened. Remove from heat, cover and keep the sauce warm.
3. To prepare the chicken for coating and frying, whisk the egg whites in a shallow dish until foamy; set aside. Combine the cornstarch, flour, baking soda, and remaining hoisin marinade in a second shallow dish; mix until it resembles coarse meal.
4. Remove the chicken from the refrigerator and from the marinade. Pat the marinated chicken dry with paper towels. Toss half the chicken into the foamy egg whites until well coated, then dredge the chicken in the cornstarch mixture, pressing to adhere. Transfer the coated chicken to a plate and repeat with the remaining chicken.
5. Heat the oil in a Dutch oven over medium high heat until the oil registers 350 degrees. Fry half the chicken until golden brown, about 3 minutes, turning each piece halfway through cooking. Transfer the cooked chicken onto a paper towel lined plate to drain. Return the oil to 350 degrees before frying again. Repeat with the remaining chicken.
6. Warm the sauce over medium heat until simmering. Turn off the heat and add the fried chicken pieces. Toss to coat and serve.
Homemade Salted Caramel Sauce


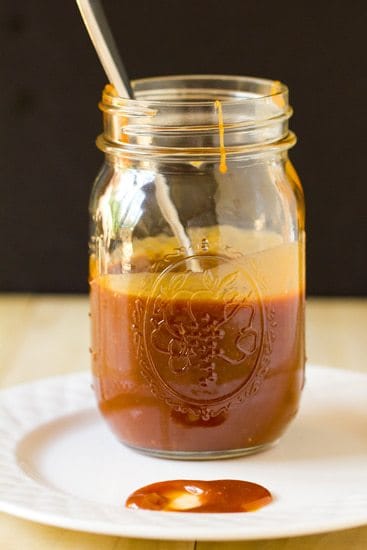
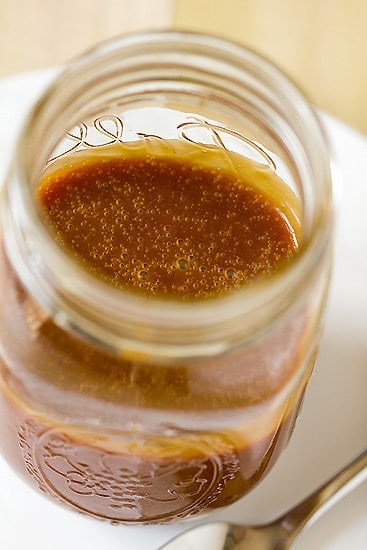
Salted caramel is currently the coolest kid in class. It’s the quarterback of the football team. The head cheerleader. When salted caramel is at a party, everyone wants to be there. While foodie crazes like macarons and cake pops are certainly deserving, I think salted caramel has some serious staying power. There is nothing about the combination of sweet and salty that will ever go out of style. You may have noticed over the last year or so, that I have completely and totally embraced the salted caramel phenomenon: Salted Caramel Chocolate Chip Cookie Bars… Salted Caramel Popcorn, Pretzel & Peanut Bars… Salted Caramel Brownies… Sweet and Salty Brownies… Salted Caramel Cashew Bark… Sea Salt Caramels with Vanilla Bean… Salted Caramel Ice Cream. The best part? I’ve merely scratched the surface. The possibilities are truly endless, which is why I thought it was high-time I settled on a standard salted caramel sauce recipe. I have experimented with different types – dry (sugar only), wet (sugar and water), some with corn syrup, some with sour cream. Needless to say, I’ve run the gamut. My conclusion? I’ve found the simplest to be the best. In 15 minutes, and with only four ingredients, you can have smooth, creamy, salty caramel sauce. Below you will find tips for making the best caramel, and a step-by-step recipe with photos.
Caramel can be intimidating, but the more you make it, and the more you will get a feel for the look and the smell, and it will become second-nature. For those just starting out, here are a few tips:
  • Stir the sugar initially to help it to melt evenly, but stop once it has completely melted to keep it from seizing.
  • If you’re new to caramel-making, you may find a thermometer will help to guide you. The caramel should reach 350 degrees F on an instant-read or candy thermometer. If you aren’t able to obtain a thermometer, you can use visual cues for doneness. The caramel should be a deep amber color and should have just started to smoke. The line is very fine here. If you don’t cook it long enough it will be too sweet with little depth of flavor, but cook it too long and it will be burnt and unusable. Once you’ve done it a few times and see the color and can experience the smell when the thermometer hits 350, you will have a better idea of how to eyeball it when you don’t have a thermometer.
  • Be sure to use a saucepan that is larger than you think you might need. When you add the butter and the cream, the caramel will bubble up violently.
Now that you have a jar of the most amazing caramel sauce, what can you do with it? The short answer? Anything and everything!
Drizzle it over ice cream. Swirl it into brownies and cheesecakes. Use it as a dip for apple slices. Stir a spoonful into hot chocolate. Put it in pretty jars and give it as gifts. Whip it into buttercream frosting (we’re doing that tomorrow – stay tuned!) Bathe in it. Eat it by the spoonful. No one judges when it comes to salted caramel!


SALTED CARAMEL SAUCE

yield: 2 cups of sauce
 
prep time: 5 minutes
 
cook time: 15 minutes
 
total time: 20 minutes

INGREDIENTS:

2 cups granulated sugar
12 tablespoons unsalted butter, at room temperature, cut into pieces
1 cup heavy cream, at room temperature
1 tablespoon fleur de sel (or any other flaky sea salt)

DIRECTIONS:

1. Add the sugar in an even layer over the bottom of a heavy saucepan, with a capacity of at least 2 or 3 quarts. Heat the sugar over medium-high heat, whisking it as it begins to melt. You'll see that the sugar will begin to form clumps, but that's okay. Just keep whisking and as it continues to cook, they will melt back down.
Stop whisking once all of the sugar has melted, and swirl the pan occasionally while the sugar cooks.
2. Continue cooking until the sugar has reached a deep amber color. It should look almost a reddish-brown, and have a slight toasted aroma. This is the point where caramel can go from perfect to burnt in a matter of seconds, so keep a close eye. If you are using an instant-read thermometer, cook the sugar until it reaches 350 degrees F.
(The lighting doesn't depict the color perfectly in the photo above, but if you look to the left side, you will see there is some darker caramel underneath - this was the predominant color at this point.)
3. As soon as the caramel reaches 350 degrees, add the butter all at once. Be careful, as the caramel will bubble up when the butter is added. Whisk the butter into the caramel until it is completely melted.
4. Remove the pan from the heat and slowly pour the cream into the caramel. Again, be careful because the mixture will once again bubble up ferociously.
Whisk until all of the cream has been incorporated and you have a smooth sauce. Add the fleur de sel and whisk to incorporate.
5. Set the sauce aside to cool for 10 to 15 minutes and then pour into your favorite glass jar and let cool to room temperature. You can refrigerate the sauce for up to 2 weeks. You'll want to warm the sauce up before using.
Copyright @ 2013 makingfooditems. Designed by Templateism | MyBloggerLab

About Metro